Welcome,
I had a young boy ask me the other day how blacksmiths drill a hole in steel when there were no drill bits or electric drills. I explained to him that they used a round or square shaped punch to make the hole. He rather liked the idea of making a square hole. I was unable to show him at the time and I'm not sure he was able to understand exactly what I was explaining, so I thought this would be a good subject for our discussion today. Although blacksmiths were soon able to acquire hand crank post drills and drill bits to make holes, it was still sometimes easier and cheaper to punch the hole hot instead of wear down a costly drill bit.
Here I am going to punch a 3/8" round hole in a piece of scrap I had lying around. For comparison reasons the piece of stock I am using is 1/4" x 3/4" bar. Here is my punch made from an old coil spring off of a car. The spring was heated, straightened, forged to a point and then ground round. The point is not pointy at all, but is very flat. Using old car springs is not the best for these hot forging operations, but it is free and does the job well enough. If you keep quenching the punch and don't let it get to hot, it won't deform much at all. If it gets deformed it's usually not too much trouble to take it to the grinder and true it up again.
Here is the bar red hot from the forge and held down to my anvil with my hold down tool (we'll get to that tool another time). After lining the punch up to the center of the bar (this is just eyeballed) I take a few quick strikes with one of my larger hammers.
All I need to do is go a little more than half way through the bar. Every couple of strikes I took the punch out and quenched it to make sure it stayed cool.
Now I flip the bar over and look for the impression of the punch on the back side. You can usually see a ring where the punch was coming through. This can be a bit tricky as you kind of have to guess where the punch "would" have gone through.
After I have my punch lined up exactly over the hole on the other side that I can't see, I take a few strikes with my hammer again. The problem here is that the punch will only go so far and then hit the anvil surface.
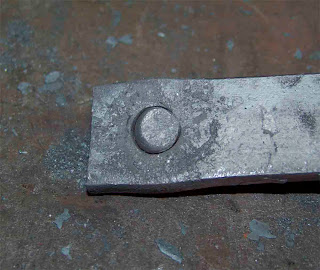
Here is the slug just about free from the bar. You can see that it stopped when it hit the anvil.
To finish this off I placed the soon to be hole over the pritchel hole in my anvil and struck the punch through a bit more driving the slug out and leaving me with a nice clean hole.
Here is the bar with a 3/8" round hole nicely centered on the bar, the flattened slug that was once in the hole and the barely deformed punch. I have used this method to create round, square and oval shaped holes. You just have to make the punch the shape you want the hole.
Well, thanks for coming by today and remember to strike when the iron is hot.
For examples of more of my work, please visit:
http://www.jenniferannmurphy.etsy.com/


No comments:
Post a Comment