Showing posts with label Spin/Fiber/Yarn. Show all posts

Tuesday, April 12, 2016

Learn to Spin Plying Techniques Video


In this video I show how to blend 4 colors by plying a 2 ply yarn. In the first skein the colors are distributed evenly, in the second they are distributed unevenly. This allows for every color to touch every other color in the finished 2 ply skein. The finished yarn is well blended.


Friday, January 15, 2016

Huckleberry The Softest Goat There Ever Was, Video!

Huckleberry was our wonderful mistake goat. He is the result of our Angora buck who blasted through the fence to get to our Nubian that was in heat. Huck is the result of their union and we couldn't be happier. In the world of mixed breed fiber goats, his fleece would be considered a B-C type. It has cashmere properties and will most likely comb out in the spring away from the guard hairs. This will be a dream to spin! Type A is more like the Mohair we shear from our Angora goats. All the wool is usable and can be sheared like a sheep. There are no guard hairs.

Because he is half fiber goat, we decided not to dehorn him when he was young. Fiber goats need their horns because they act as an "air conditioner" for the goat in hot temperatures.

We love Huck and hope you enjoy this video we put together about him. 


Thursday, November 5, 2015

Plying and Color Technique

This is a color technique is one I use often for thoroughly mixing solid color roving throughout the skein. The blue skein, I spun in a more random manner, and if you look closely, you can see lengths of yarn that are plied all one shade. It's most evident in the light blue. This technique will prevent that.

I'm using 4 solid colors of our hand dyed mohair in this skein. I've dyed it into two cool shades of true purple and bubble gum pink and two warmer shades, more of a plum and a salmon-y, dusty rose. I want to thoroughly mix these four shades so that every color touches every other color.

To do this, I take 1 oz of each color roving. When the skein is spun and plied it will be a 4 oz skein. I'm going to spin the first two colors, the pink and pruple.

I break the roving into somehwat even lengths, around a foot. And spin these alternating. Where the pink attaches to the purple you get the "pink/purple" blend.

Then I break the plum and dusty rose into lengths, about 6 inches each, and I spin these on a separate bobbin. Again, where the two colors alternate, I get the "plum/dusty rose" blend.

Then I ply the two bobbins together. The colors hit at different intervals and you get all colors combinations throughout the skein without two of the same color hitting at the same time, which would result in lengths of pink on pink yarn.

This is a great technique for using up bits of unused roving, odd colors or fiber that you don't have a lot of. You don't need a lot of each color/type just enough to break it up throughout the skein. You can do this with several different colors, it doesn't have to be 2 and 2.


Friday, January 30, 2015

Sock Knitting Machine

Zach bought me this sock knitting machine about 8 years ago after we visited a heritage festival. There was a lady demonstrating and making socks with one. I was enamored!

The lady made it look so easy and I dreamed of cranking out socks with a machine like hers, one after the other.

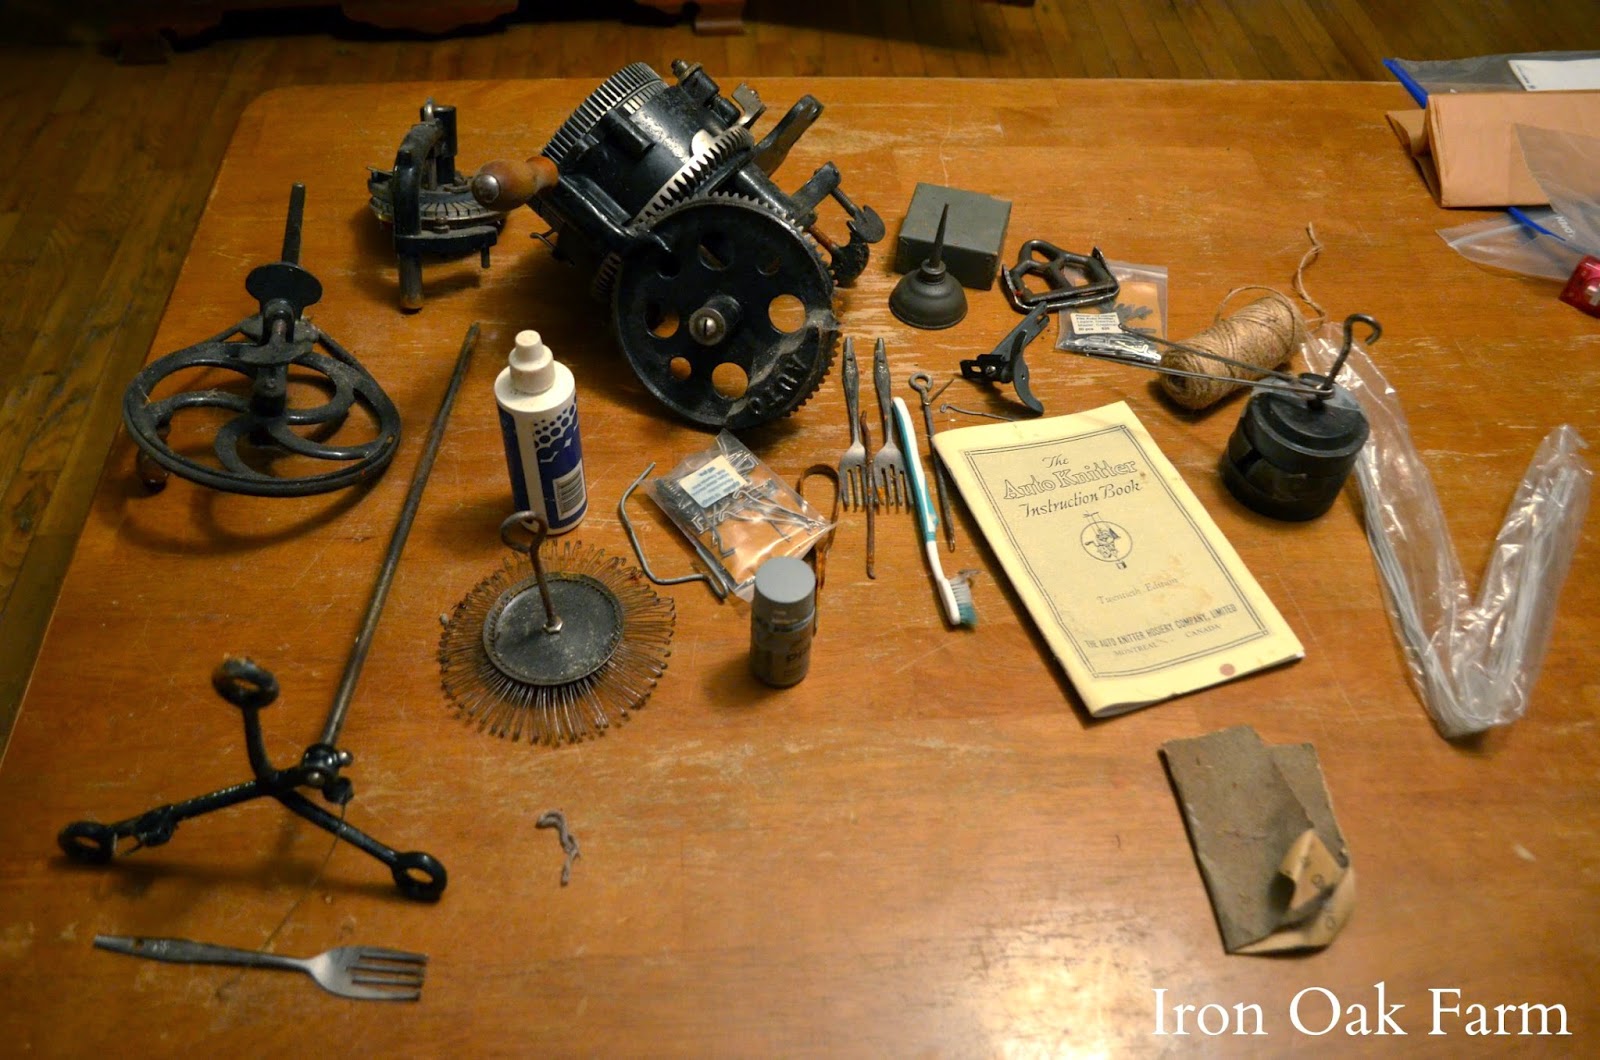
When Zach gave me the machine it needed some work. It had a good glow of rust on many parts mixed with an oily lint build up and most of the needles were broken or bent.

We replaced the needles on both the knitting canister and the ribber, took steel wool and a wire brush to the rust and cleaned every nook and cranny with a toothbrush and q-tip. Then we oiled it up and started learning how a sock knitting machine works.

8 years ago there was very little on the internet about these machines. I've noticed that since then, a lot has changed. My machine came with the original instruction booklet. Which instructed not only how the machine worked but also how you could turn a profit by using one.

In the beginning we were able to crank out a few things that resembled a sock, but the machine is very temperamental. I'm not sure if it's something I'm doing wrong, or if this machine is just finicky.

It got packed away when we moved and only recently did my friend Stacey come over for the day and we tried to get it up and running again.

We spent about 5 hours trying to re-aquatint ourselves with how the machine works, watching YouTube videos and studying the original 1923 manual.

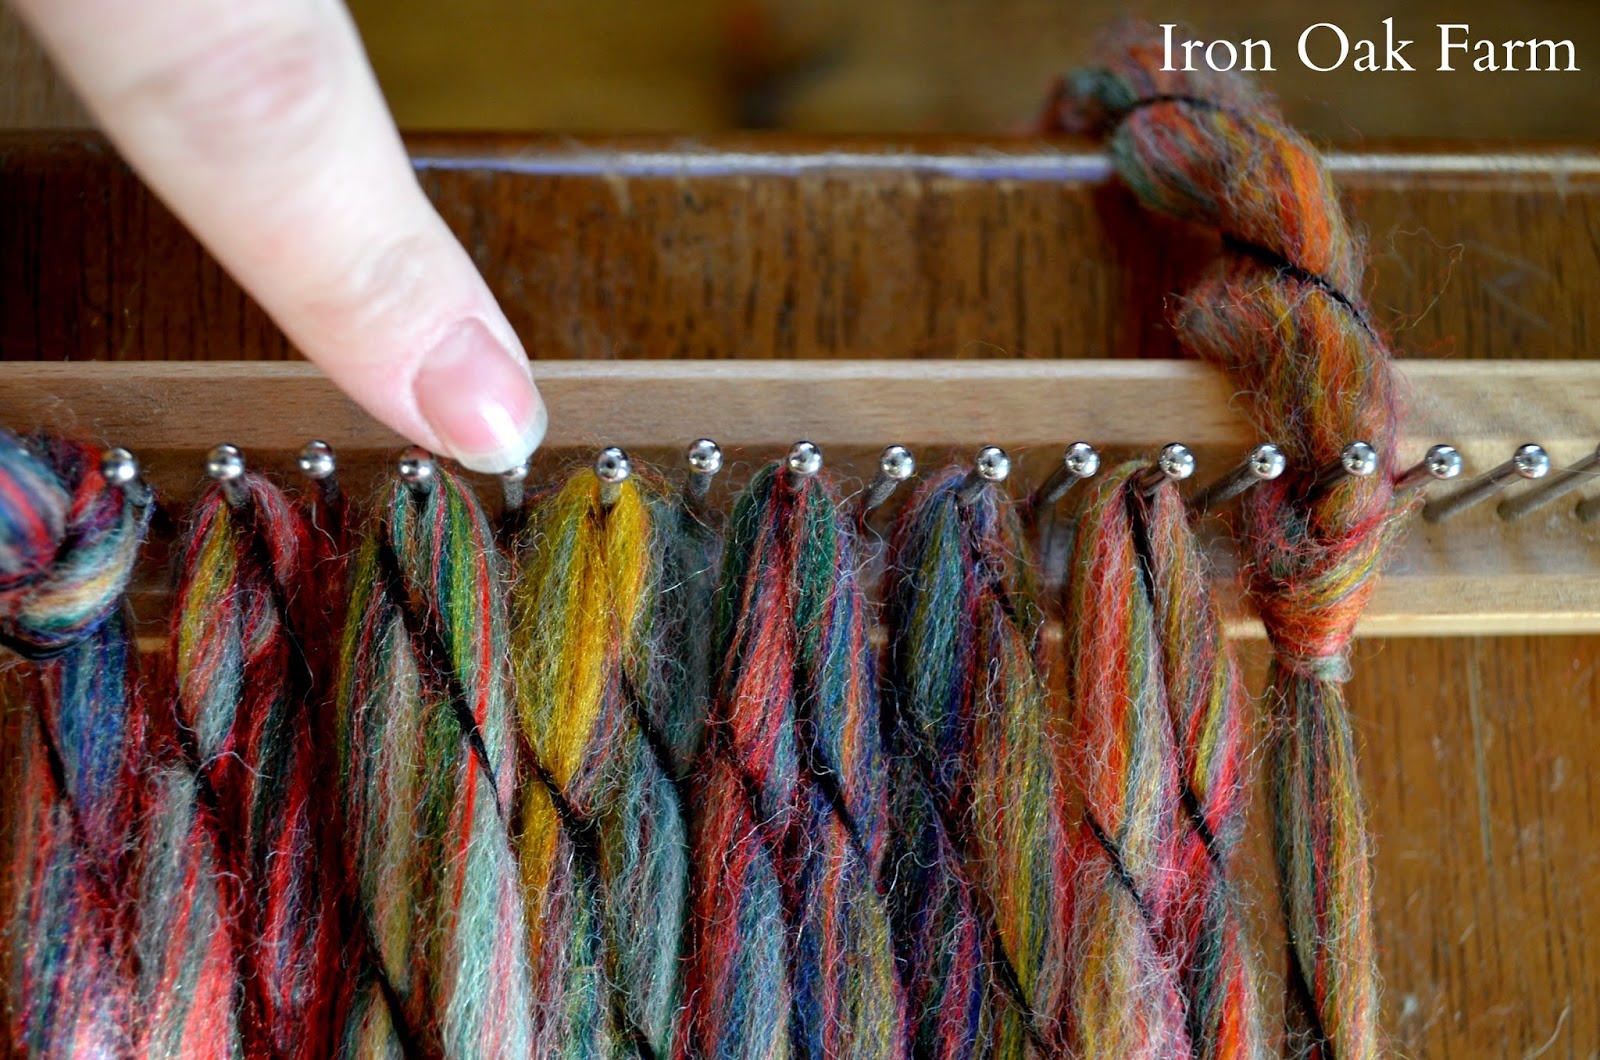
In the end we were able to get the ribber to work, and we knitted 3/4 of a sock foot including the heel.     

We didn't have the weights adjusted correctly here so we dropped the stitches on the left side.

This is where we gave up for the day.

I'm going to keep at it though, and see if I can get the hang of things. Hopefully I'll be able to share some sock knitting posts and videos with all of you in the future.

Even if I can't get a sock made, I can share how the machine works, how it goes together, and some of the history behind these fascinating machines. They have quite a story to tell!
 

Thursday, January 1, 2015

Cedar Yarn Box

I'm so blessed to be married to a man with such talented parents! Zach's dad made me this beautiful yarn box for Christmas. It's crafted from aromatic Cedar and smells wonderfully earthy and rich. Cedar is a gorgeous wood, the intricate pattern of reddish brown and creamy white are striking. I love that he let the wood speak for itself.

Each detail of the box is crafted with thought and care.

I love the brass name plate, with adorable etching of needles and yarn.

And matching brass handles...

and chain.

It also has this wonderful shelf feature which will be useful to keep my needles and other small objects organized. It's lined with a foam to keep things from sliding around.

I plan to store my hand spun yarn in this special box. So if any of you order from me, the yarn will come Cedar scented!

Thanks Dad! 

Tuesday, December 30, 2014

Grit Post: A Morning with a Goat Keeper

Come spend a morning on our farm as I take you through, step-by-step, the routine with our goats. A Morning with a Goat Keeper

Saturday, December 20, 2014

Cable Knit from the Farm

My mother-in-law Kathy is one of the most talented knitters and crocheters I know! She makes beautiful projects in all shapes and sizes. Her knitted work is is one of my favorite gifts to receive. She recently made me this beautiful cowl neck and matching boot cuffs as an early Christmas present.


What makes this gift even more special is that last year I spun Kathy a pound of single ply, un-dyed mohair yarn from our goats. I know how much she likes to knit, so I told her we could get together and dye it in any color she liked and she could make something with it. Being the generous person that she is, she said that she wanted to dye it in my favorite color (rust) and make me something.

This yarn has been the gift that keeps on giving. It has passed through my hands and her's and we've each added our own artistic gift to make something beautiful together.

I'm especially excited because this is the first knitted thing that I possess from our goats. In the 6 years I've raised Angora Goats I've never made myself anything with their Mohair. I dye it, sell it, give it away, but I don't have a single stitch of Mohair yarn made into anything.

I'm thankful now to have this beautiful cowl neck made in a blend of our yarn. Kathy knits in all sorts of styles, but my favorite is the detailed traditional knitted patterns. I love cables! The more cables and twists the better...she knows that about me. 

Monday, November 24, 2014

Faux Large Loom, Hand Woven Scarf, Part 3

Click here for Part 1 and Part 2 of this project.

To finish the scarf, remove the outer loop around the peg of your loom.

Snip this loop with a pair of scissors,

and tie twice.

Repeat on the other side of the scarf.

Work back and forth sniping and tying off until

the scarf is removed from the loom.

Repeat on the other side, and the scarf is finished!

Sunday, November 23, 2014

Faux Large Loom, Hand Woven Scarf, Part 2

To learn how to set up this project please visit Part 1 in this series. 

To begin weaving, you're going to want to leave some space before the first weft and the loom. This space will create your tossles on the end of each scarf. You should have your clothes pins marking your weft spots. 

I began by tying on the first color. You're going to be working with two strands at a time.

Pull the first strand under the second warp moving bottom to top.

Then pull the second strand in the opposite motion moving over the second warp and under the third.

If you pull each strand slightly to the right, you will create a twist between the two strands and this will lock the scarf in place even better.

Continue this over under pattern to the top of the scarf.

Adjust the weave so that it's straight. 

You can tie it off here, or simply loop around and repeat the over under process moving back down the scarf.

Adjust the second weave to snug it up next to the first,

and repeat a third time.

You can finish the strand at each weave by tying off and tucking it between the plies of the thicker yarn. (Like you would in a knitting or crocheting project.) Or you can leave them in a fringe, or simple snip them close to the knot.

Work this way, alternating strand colors until you reach the end of the scarf leaving room for tossels at that end too.

To learn how to finish this project please visit Part 3.

Saturday, November 22, 2014

Faux Large Loom, Hand Woven Scarf, Part 1

I saw this yarn at a local yarn store and fell in love. Sometimes a yarn just stops you dead in your tracks and you have to have it! This was such a case.

The moment I saw it I knew that it needed to be woven. The yarn was bulky almost like a multi-colored roving plied with black string. It was too busy to be knitted or crocheted and I wanted the yarn to simply speak for itself.

My challenge was how to weave such a long piece without a large loom.

So I decided to cheat! I have several lap looms meant for loom knitting. This wooden one is particularly handy for this project because it unscrews and comes apart.

So I separated the two halves and clamped them to opposite sides of out coffee table with wood clamps. This way I could use the length of the table to lengthen the loom space.

If you don't have a wooden loom, two plastic lap looms would work as well.

Then I worked the yarn back and forth across the table skipping a peg between each length. In a sense, I was warping the loom. I learned at the end that it's a good thing to finish with an even number of warped yarn to make things easier when tying off the finished scarf.

Once the scarf was warped I found some Terracotta and rusty-burgundy yarn in a smaller thickness to weft the scarf.

I marked the places I wanted to weft with clothespins, leaving about an 1 1/2 inches between so that the thicker yarn would show through.

Then I pre-cut all my weft lengths alternating between each color. These ended up being about 1 1/2 ' which would give me three rows of weaving. 

Now I was ready to begin weaving. Check out Part 2, and Part 3 for instructions on the weaving process.
BlogCatalog